One of the most over prescribed exercises is the front plank. Sure, it hits a lot of great muscles and can definitely help with building core endurance but when it comes to back pain you want to stay away from the front plank as the only form of planking you do. Today, I want to talk to you about the side plank and the different ways you can use these to build a resilient back.
In today’s article you will learn:
- How to use the side plank and its many other forms to build core stability while protecting the spine
- How to make changes in what you’re currently doing if these tend to make your back pain worse.
The side plank is key to building a more stable spine for one reason only. It’s one of the few exercises that incorporate the Quadratus Lumborum (QL= Which I covered in an earlier post on how to stretch and treat a tight QL) with the muscles along the abdominal wall. This is key for building the support the spine needs. Why this exercise is so awesome is because you can challenge these supporting muscles one side at a time during the plank. While one side is contracted the other is in a relaxed state. This allows you to hone in on each side of the spine and learn what it feels to have the area contracted. Often times we see people with poor mechanics simply from muscle amnesia. This will help cure you of said amnesia 🙂
Getting in Position
This exercise is super simple. While laying on your side, I recommend everyone starting on their elbows and knees as the main points of contact. Through out the different forms of this exercise, your points of contact will either be your knees and elbows/forearms or your feet and elbows/forearms. Normally, those who experience back pain when in this position should start at the most basic level to ensure they aren’t putting too much stress on the problem area. Being able to contract the abdominal wall without pain is your goal when starting from your knees. As you progress, you will be able to experiment with adding rotations but for now, stick to the basics.
How to do it
Once you are lying on the side you want to start with, brace the core and lift up with the hips until the head, neck, trunk, and knees and/or legs are in a straight line. The hand that is not being used can either lay along the side of the straightened body or wrap around to the opposite shoulder to give more support to the shoulder that’s carrying the load.
The progression to the side plank
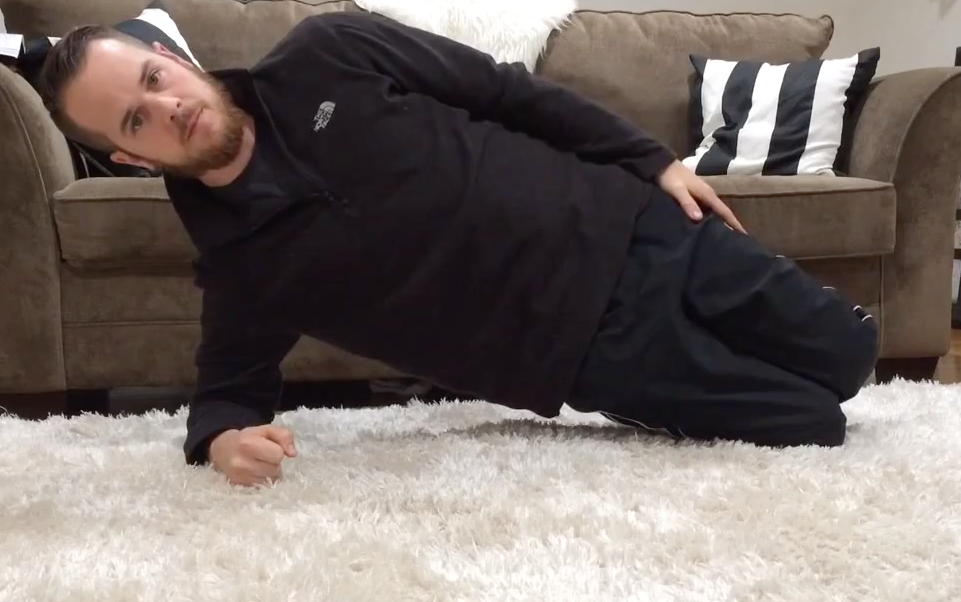
Basic: Upper body weight is on elbow/forearm with the lower body point of contact on the knees
Moderate: Upper body weight is on elbow/forearm with the lower body point of contact on the feet (legs are straight and knees off the ground now). Top foot is in FRONT of back foot. Do not stack the feet.
Advanced: Upper body weight is on the elbow/forearm with the lower body point of contact on the feet (legs are straight). Now you will add in a rotation. This level will have you starting as a side plank then rotating with the shoulder and hips as one unit into a front plank and back into the opposite side plank. By the time you are done you would have done 10 seconds on one side rotated through to the other side for another 10 seconds. The link will take you to a video where you will see me demonstrating the basic movements.
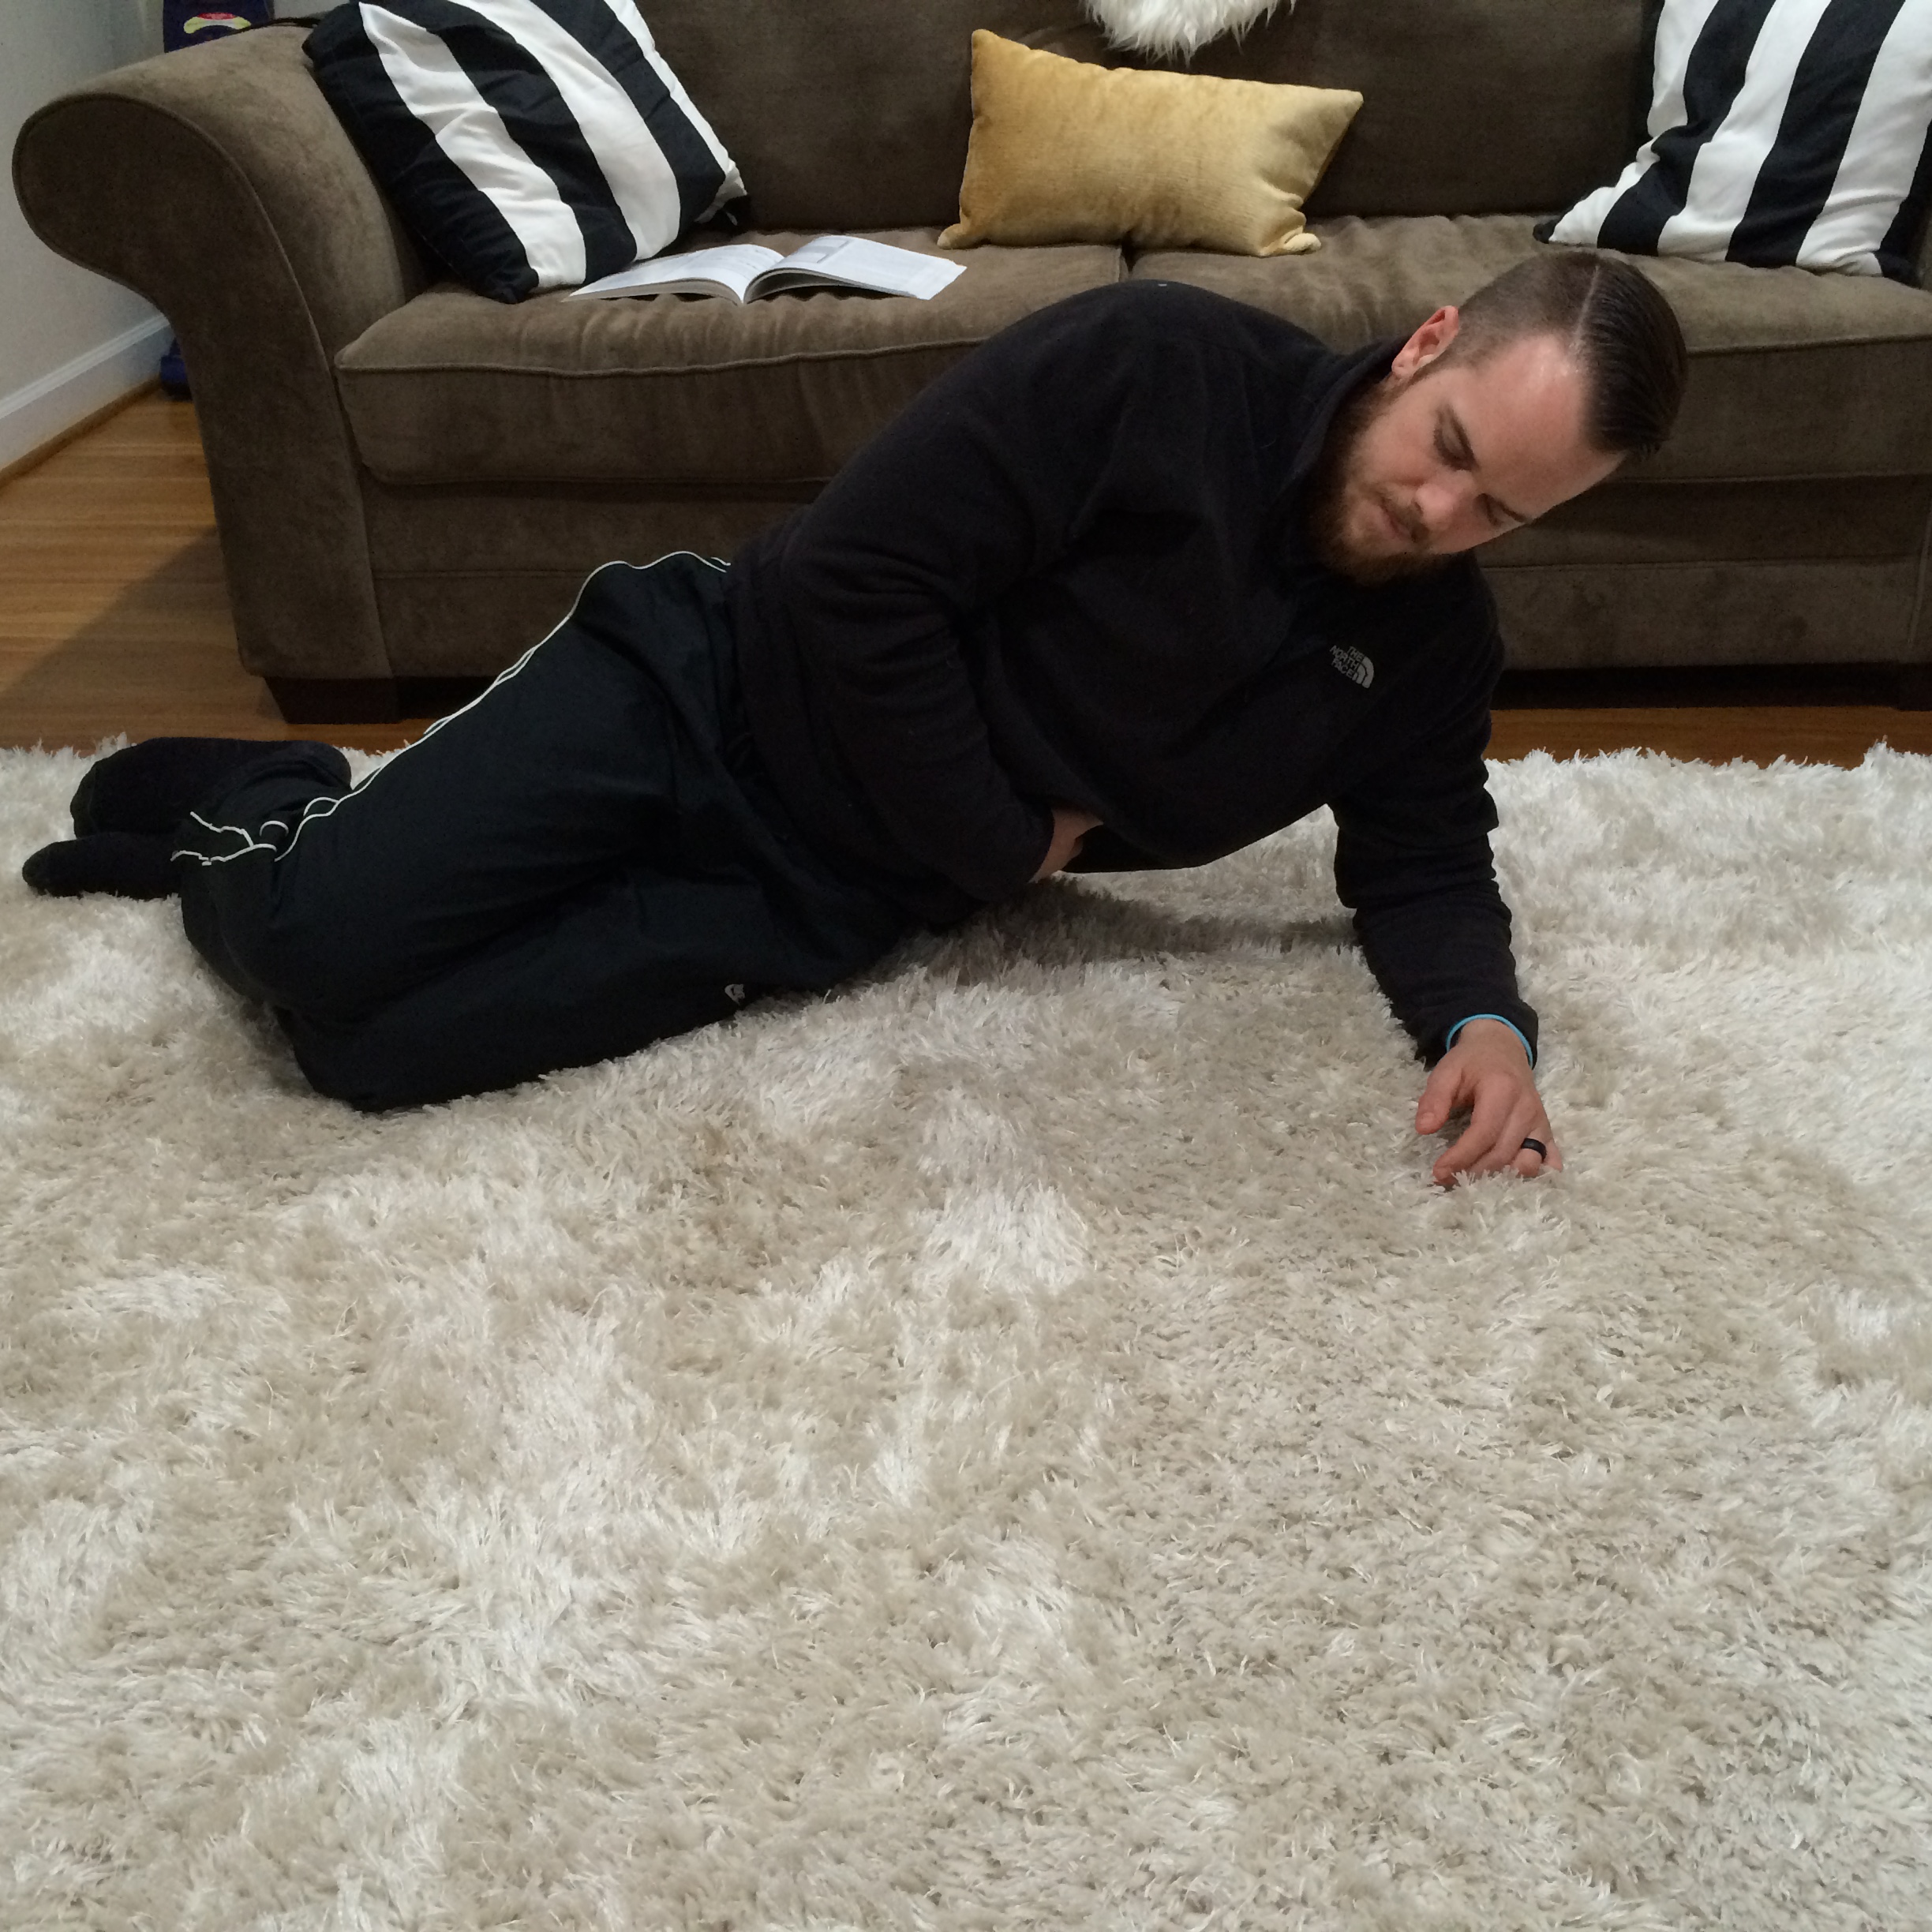
Basic Level of Side Plank
Moderate Level of Side Plank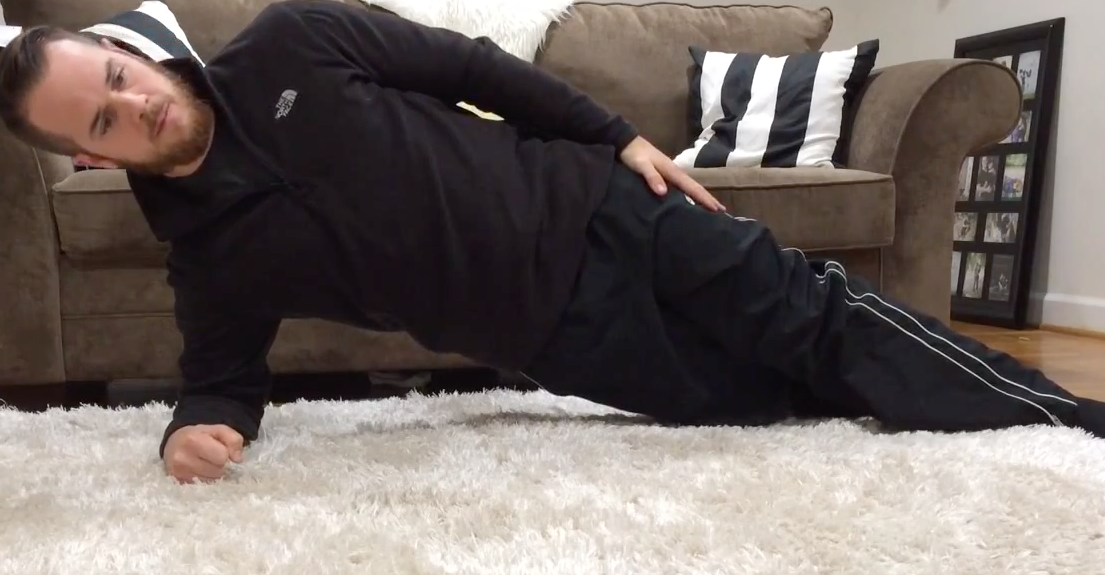
Excuse the anti-smile campaign I’m running…these were screen shots from a video 🙂
How Much Should I do?
Just like with the McGill Crunches, your range will be between an 8-10 second hold. Remember, this all goes out the window if you start experiencing pain at 5 seconds. Start at your own pain capacity and increase as you experience less pain. For starters, your goal is to complete 3-4 holds on each side of the body. If you’re focusing on the basic plank, then start with 3-4 reps on each side. Hold each rep for 10 seconds and rest 10 seconds between each one. As you work to six pain-freee) you will want to use the same Russian Pyramid approach just like we used in the McGill Crunch. You will do six holds the first round then come back and do 4-5 holds than 2-3 holds, than 0-1 holds. Once you can successfully complete the basic to moderate level you can begin to incorporate the advanced rotations.
With the advanced rotations your reps will include each side holding for 10 seconds with a 3 second hold in the front plank position. Work up to 6 reps but continue to use the pyramid technique to ensure you are not over doing it. Just so we are clear. You will hold one side for 10 seconds, roll to a front plank and hold for 3 seconds then finish on the opposite side for another 10 seconds. Altogether this is 1 rep.

Fine Tuning the Side Plank
It’s really hard to mess this one up. In-case the plank is new for you consider a few tweaks to help with form.
- If you are experiencing pain after you get out of the plank and waiting for the next rep to begin, odds are your resting in a sloppy position. This is HUGE for me. Whether it’s laying on the couch watching TV or working on these planks if I am not cautious about how I am resting I can really turn up the irritation in my lower back. If this is you, straighten and align the pelvis and hips to fine tune your sweat spot for resting. Normally you will notice a big difference in your sloppy resting position and the position that causes you zero pain. For now stay in that sweat spot as much as you can!
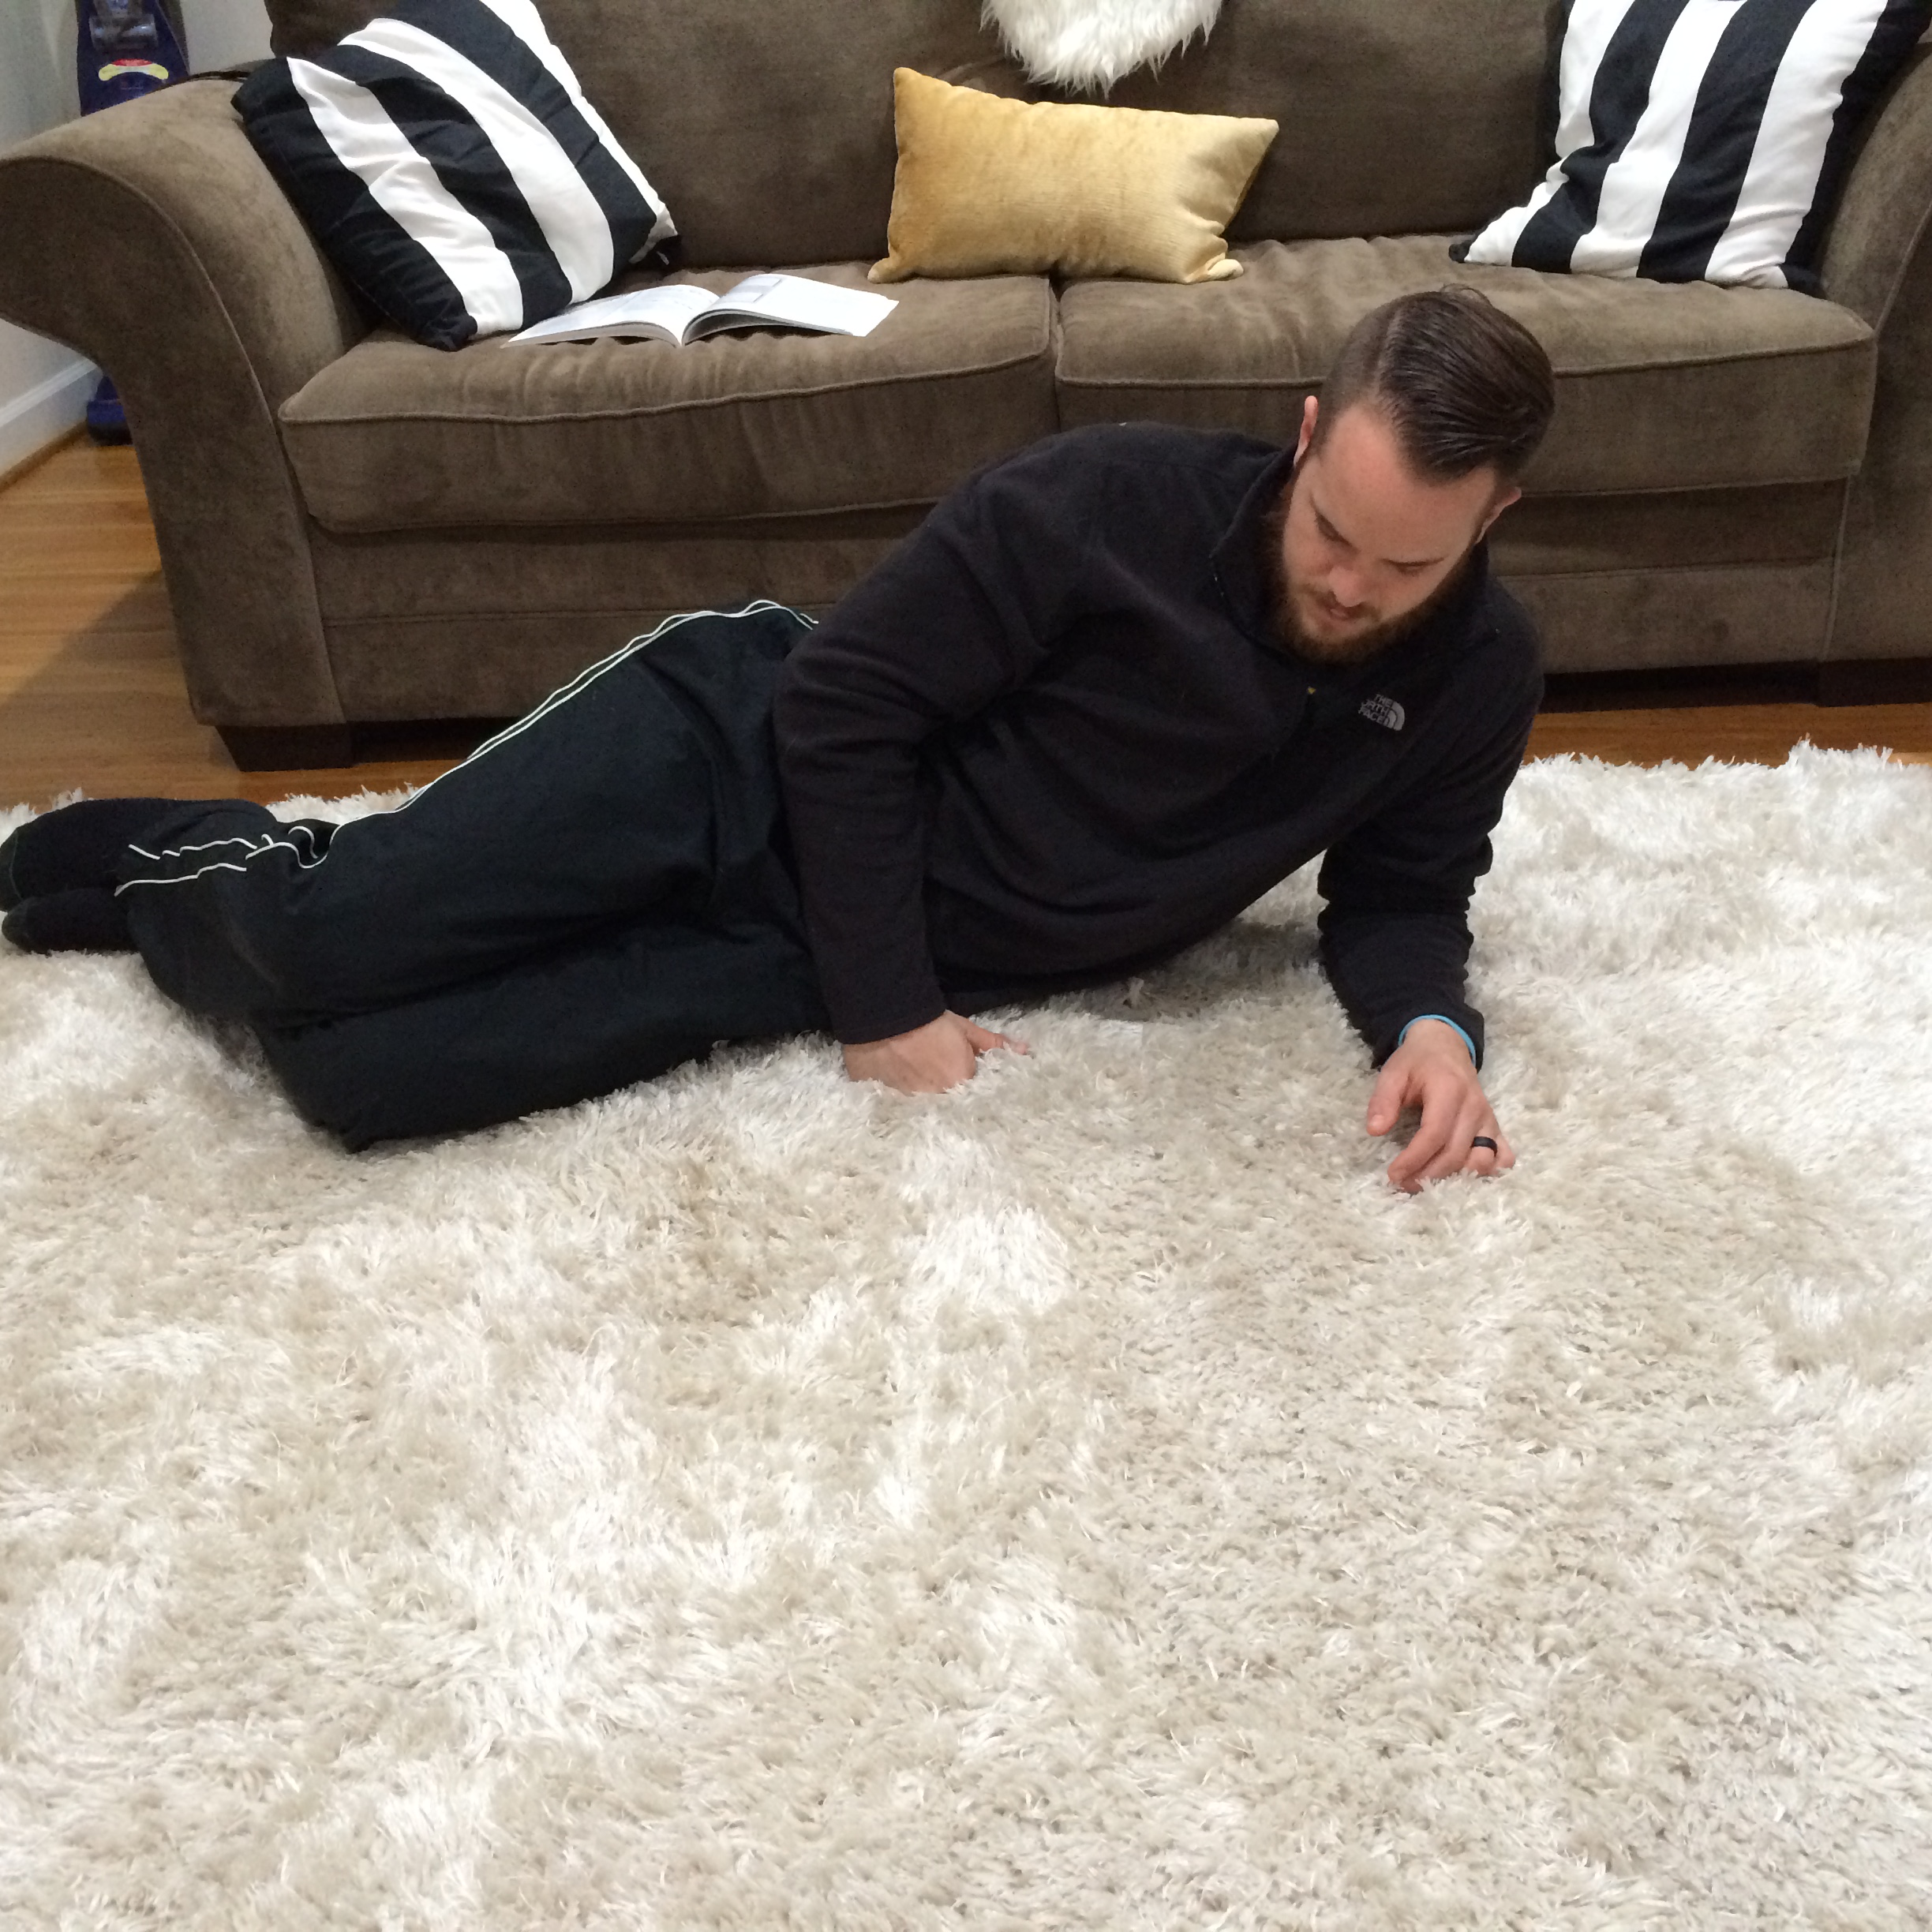
This is the exact thing you want to watch for when resting between planks. This is what a sloppy resting posture looks like. Simply doing this for one round can severely affect your pain levels for the rest of the workout. Be cautious of your spines position during the early stages of rehabbing your bad back.
This is the best way to rest between reps or sets. Keep the pelvis and hips in a straight line with the core lightly contracted enough to maintain this position. You will notice a HUGE difference.
2. As soon as you start, if you’re experiencing a weird catching pain in your lower back start with few cat/camels to lube the joints in the lower back. That seemed to help me before starting any of the McGill Big 3 exercises. If you have been siting or standing too long our spine will tend to favor the poor posture we were just in. You want complete freedom to adjust and position the spine in that “sweet spot” I always talk about. Freeing up any sticky points in the spine will allow you to do this.
3. Whach your foot positioning. You want your top foot in front of the bottom foot on either side. Do not stack the feet.
Again, this exercise is pretty easy. Most people just jump the gun wanting to push themselves to the limit. That’s the worst thing you can do. I can’t stress it enough. Your work capacity is limited to your ability to remain PAIN FREE while doing the exercise. As soon as that capacity starts creeping up. STOP.
If you missed last weeks break down of the McGill Crunch check it out here. I go over why a lot of people currently doing the exercise are still experiencing discomfort in their lower back.
Thanks for reading guys!
William
P.S. How has the McGill Crunch been working out for you?
Reference: McGill, S (2015) Back Mechanic. Ontario, Canada: Backfitpro Inc

Can you mention if an alternative to the side-bridge… a reverse side-bridge where the trunk and hip stays on the floor and straight legs (parallel to eachother) are raised off the floor… is as effective as a traditional side-bridge. I had to adapt this exercise after having surgery on compressed nerves of the shoulder, elbow, arm. Side-bridges are not possible to do now.
Hey Iva!
Have you tried doing side planks standing while up against a wall?
William