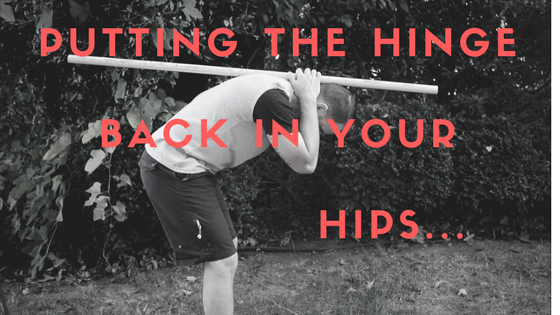
When it comes to picking apart your own pain cycle, you have to pay attention to the details. The best place to start when trying to ditch your doctor and flush your pain meds is to look at the activities you do every day. Not just the ones that cause pain but simply the ones you do the most often. This is where your source of pain will be found. One thing that most back pain suffers have in common is their lack of ability to use their hips to bend. Instead, we forgo the hips and bend at the lower back. Repeat this a couple hundred times a day and I am sure you can imagine the discomfort it may cause. Today, I want to give you two simple cues I use with my own personal clients to help regroove what a proper hip hinge looks like.
A Simple Strategy For Reducing Back Pain When Bending Over

What I wanted to do today is go over the most fundamental tool to reducing the inflammation you’re experiencing in your lower back.
No matter how many times you bring it up, most back pain sufferers tend to overlook the severity of the hip hinge during 95% of our daily movement. It’s something that is so simple yet plays a huge role in your daily life. Today, I want to show you two short videos of cues that I use with my clients to start seeing immediate relief when it comes to doing the daily activities we all take for granted.
I want to give you one small glimpse into taking control of your own personal pain cycle.
My first cue for anyone dealing with back pain is to have them show me what the “Short Stop Position” looks like.
In this clip, you will see me concentrating on the brace I am trying to create in my stomach before going into the hinge.
The 3 big mistakes back pain suffers make with the hip hinge:
1) They don’t hip hinge at all
2) They don’t brace their trunk
3) They think since the move is so simple you can’t mess it up. THIS IS HUGE!
When doing this early stage of the hip hinge, you need to be able to do it PAIN-FREE. If you start to go down and you feel a catch or any kind of painful feeling, stop and start over. This should be done pain-free.
The next progression is moving the hip hinge to your knees.
The cues are pretty much the same except this time your focusing on bringing your butt back to your heels and hinging at the hips. My hands in this video are just cueing the brace you should have in your trunk.
There are a few more progressions to this technique but I don’t want to load you with too much info. I want you to take action with these first few steps. If you want to go deeper and learn how to not only progress but apply it practically in your everyday life, be looking out for my course to launch next week.
Application:
Practice these two hip hinging cues 2-3 times a day. Beyond that, start thinking about where you can implement these hip hinging cues into your day. Think about it while you’re at work, at school, at home grabbing your baby off the floor, washing the dishes, brushing your teeth, cleaning around the house or at the gym. These are the things that make up your own personal pain cycle.
Remember to keep the BIG 3 mistakes in mind whenever you go to hinge!
I’ve got more for you later this week!
How often do you think you bend over during the day? Let me know in the comments below!
Ttys!
William


1 thought on “A Simple Approach To Reducing Your Back Pain While Bending”
Comments are closed.